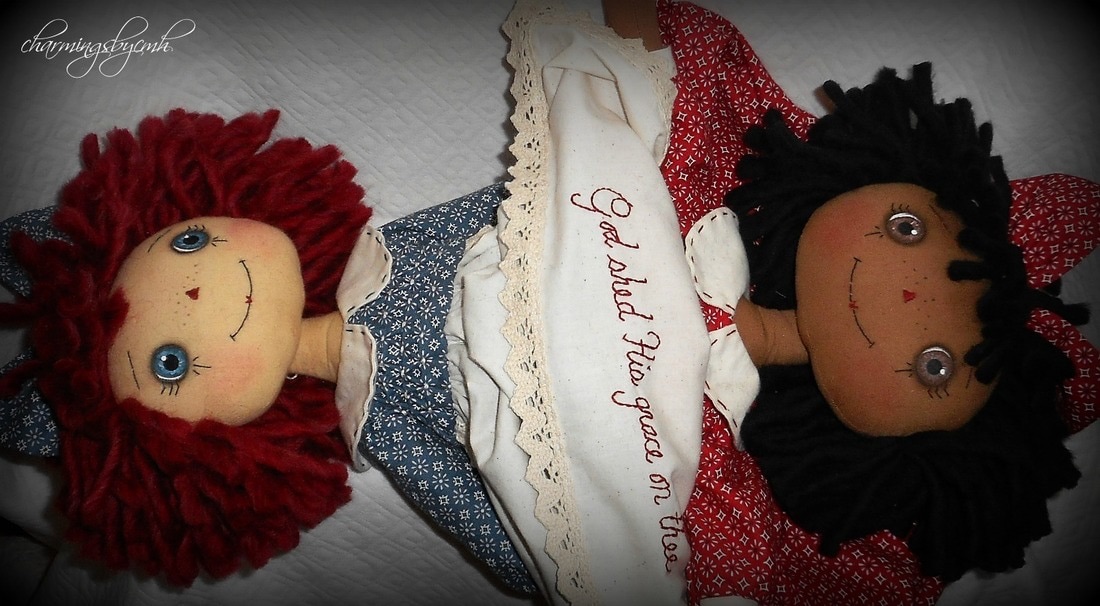
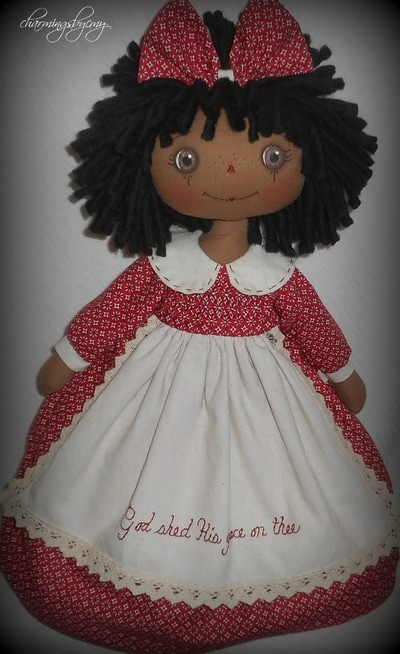
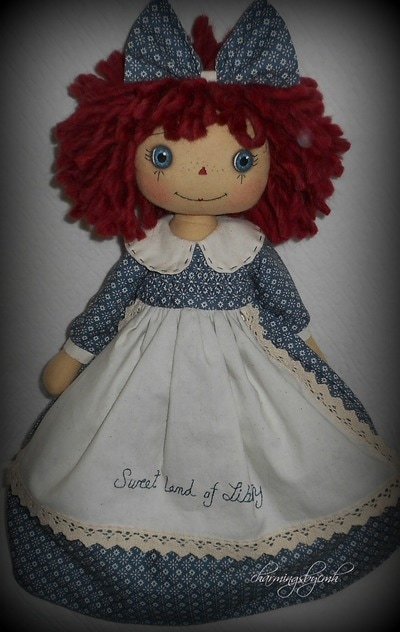
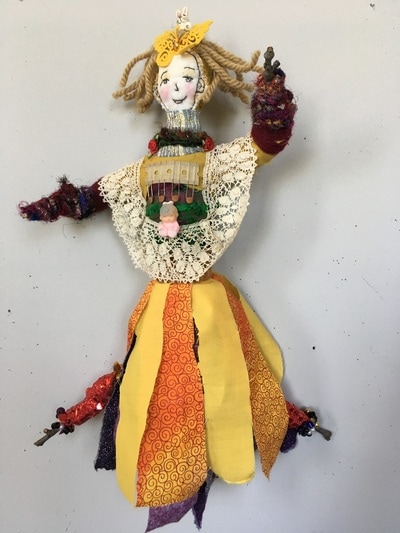
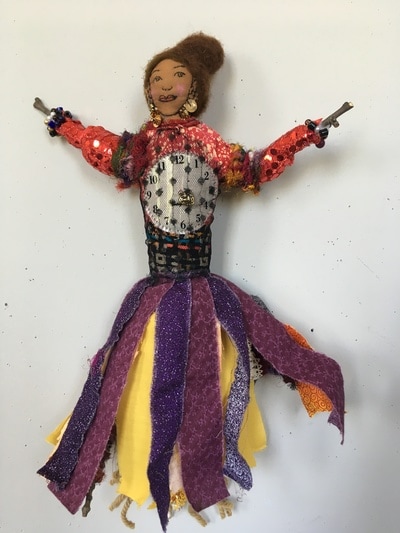
 "Patriotic Flip Annie Doll" by Carolyn Hudacek, the first response to the Flip Doll Challenge. "Patriotic Flip Annie Doll" by Carolyn Hudacek, the first response to the Flip Doll Challenge. This is the sixth post in a series of articles about my current project: REVISIONING FLIP DOLLS. I received a Conant Grant from the Potomac Fiber Arts Guild and as part of this project, I worked with homeless women at N. Street Village in DC making flip dolls; interviewed professional artists who make flip dolls, and have been making my own flip dolls. And more... This month I want to give you an opportunity to participate in the flip doll process. Above is the first entry in the flip doll challenge, by Carolyn Hudacek. Carolyn's doll features handsmocked skirts and is meant as a "Patriotic Flip Doll." Please visit her blog to see more of her "Annie" dolls, all tributes to her mother, also named Annie. In this issue of Transformative Healing Dolls newsletter, I am focusing on the Flip Doll Challenge, which I hope many of you will choose to participate in! You can make your flip doll out of any materials you choose. For inspiration I have included instructions on how to make a stick flip doll (see below for link to instructions and a video.) You can also be inspired by Carolyn's doll. Another source of inspiration is an article on topsy turvy dolls by Linda Walsch. She includes information about the history of these dolls and has several links to topsy turvy doll patterns. To participate in the FLIP DOLL CHALLENGE: 1. Make a flip doll out of any materials you choose, using the stick doll instructions, look up flip or topsy turvy dolls on-line or create your own design. 2. Submit an image of your doll to Flip Doll Challenge or by responding to this newsletter. Please include, your name, title/name for the doll, dimensions, cost (if it is for sale) and any information about the meaning of the doll. 3. Your doll will be featured in a future issue of this newsletter. 4. Plans are also in the works for an exhibit of flip dolls from this challenge, dolls created by the women of N. Street Village and by Erika. I will keep you updated on this. Please indicate if you would be interested in participating in this exhibit, currently scheduled for February/March 2018. I look forward to hearing from you! Below are two more views of the first entry in the Flip Doll Challenge, by Carolyn Hudacek. Stick Flip Doll, Below is a stick flip doll which I made in response to my work with homeless women at N. Street Village in D. C. The first side is the artist, with details symbolizing what I learned from this experience. For more about this doll, see answers to questions below. I also made this doll as inspiration to you in case you want to use this simple method to create your own flip doll. Below are step by step instructions on how to make a stick flip doll in video and written form. See below also for an example of a soft sculpture flip doll that I'm currently in the process of working on... 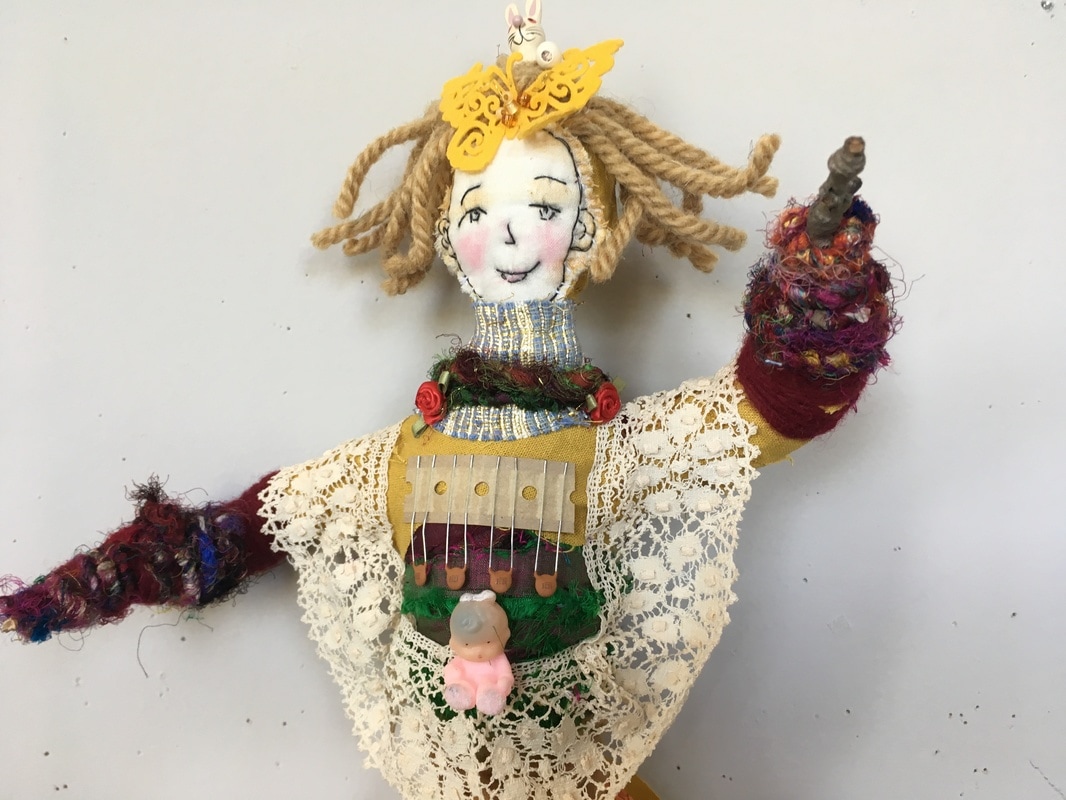 Instructions for Making a Stick Flip Doll: Erika Cleveland www.transformativehealingdolls.com Please also refer to the video above to see images of each step. Materials Needed: sturdy sticks for armature quilt batting cut into 1-2” wide strips fabric strips 1-2” wide, approx 12” long duct tape sewing needle and thread glue gun (optional) soft pencil or fabric marking pen colored yarn or felting wool for hair needle felting needle to attach wool hair (optional) sewing pins beads, lace, sequins and other materials for embellishment two different patterned pieces of fabric-approx. 10” long by 18” wide for alternate sewn skirt (optional) sewing machine (optional) Instructions: Start by laying out your sticks, one or two long ones, approximately 12” long with two smaller ones approximately 4” from the top and bottom, for arms Wrap two longer sticks together (in the video it shows one longer stick, sometimes it can help to use two for extra reinforcement) using duct tape Wrap the two smaller sticks crosswise to the longer one with duct tape Wrap entire piece, long sticks and shorter with quilt batting strips. You can tuck the ends of the pieces under to secure them and then continue on from there, wrapping the ends of each strip on top of each other. Use enough to get the thickness you want. You may want to wrap an additional thick layer over the head area and over the chest and upper arms Once you have covered the body to your liking with quilt batting strips, you can start adding fabric strips for the body, arms and back of the head. I like to leave room at the ends of the arms to show some of the end of the stick for hands. You can arrange the strips however you want to delineate the areas of the chest, arms and waist, creating a separate arrangement for each side of the doll to differentiate them into two separate characters. To make the heads, cut out a two squares of fabric for each side, approximately 2” square. Sandwich a piece of quilt batting in between the same size-2” square. With the soft pencil or fabric marker, draw simple features of a face Pin together to hold into place and then stitch along the lines of the drawing using a simple backstitch-looping back into the previous hole to create a continuous line. Cut out the shape of the face with some material around the edges, enough to attach to the fabric on the head area of the doll. Stitch (or glue) face onto the head Loop colored yarn in a length determined by how long you want the hair to be (measure by draping over the head) and cut into individual lengths. Sew along the intended hairline. If using felting wool for hair, it can be felted onto the head using the needle felting needle The skirt is make by overlapping strips of fabric, attached and sewn to the waist. Choose different colors for either side of the doll. Last step is to embellish with beads, lace, sequins or other materials of your choosing to make the doll more individual. To make the alternate skirt-attach the two 10” x 18” pieces of fabric together back to back, leaving a small opening at the edge. Turn outside in and sew opening together by hand. Attach skirt at the waist using a running stitch and leaving ends of thread loose, so that you can gather folds together. Notes: Quilt batting comes in cotton or polyester. For this purpose it’s fine to use the poly or poly blend version. I prefer to sew the fabric strips to the doll but if you want to work faster you can use a glue gun instead. I use strips of fabric for the skirt as a quicker, simpler method, but you can alternatively make a more traditional skirt and sew it to the body. For the head, I’ve shown a way of making a small face with stitched features. There are many other ways to make heads, including: pressed mold clay heads, faces printed from photographs onto fabric. These require other techniques and materials, which can be researched on-line. Questions to ask yourself to ask once you make your flip doll. 1. What is your doll’s name/names? Is this someone in your life, someone famous or invented? 2.Can you say something about the colors/textures in your doll? 3. Are there meaningful symbols on your doll? What do they mean to you, if so? 4. What is your doll’s story? Are the two sides opposites of a story or two sides of the same idea? 5.What lessons does your doll have to teach you? I'll answer these questions for the flip doll below to give you an idea.... 1. My doll's name is Maisie/Ernestina. The Maisie side represents me as an artist who worked with homeless women at the N. Street Village shelter in DC. The Ernestina side represents the women at the shelter whom I worked with. 2. I chose bright colors and varied textures. The Maisie side has white skin and the Ernestina side has brown skin. Many, but not all of the women I worked with had brown skin. 3. The symbols on the Maisie side are the tiny rabbit on the top of her head, the yellow butterfly on her forehead, the lace on her bodice, the tiny baby on her chest and the lighting element also on her chest. These symbols represent the innocence and open-mindedness that I tried to bring to my work with the homeless women. The richness of the lace bodice and the roses have to do with the meaningfulness of what I learned from my experience at N. Street. The symbols on the Ernestina side are a watch face without hands, a tiny heart charm, jewelry under her face and on her ears and her sequinned arms. These symbols have to do with the way in which the homeless women are somehow living in a place out of time, in a sort of holding place. The heart has to do with the heartfeltness that I encountered in meeting these women. The sequins have to do with the playfulness and fun they shared with me. 4. The doll is about the connection I felt with the women at the homeless shelter. I especially appreciate the way in which a flip doll is connected in the middle, suggesting a wholeness between two disparate elements. 5. The doll taught me about love and connectedness and how even without homes, women can exhibit generosity and caring. Studio Peek:
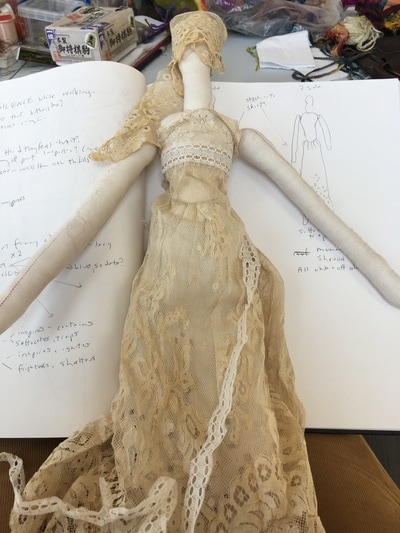
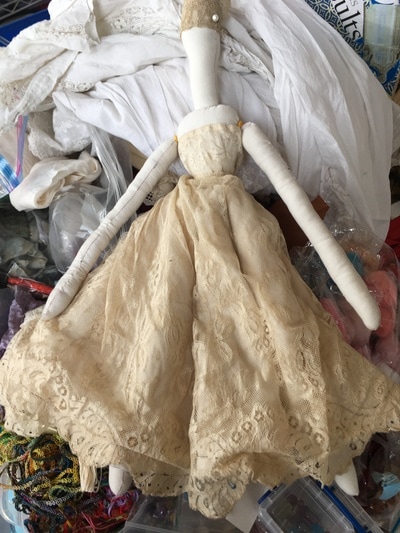
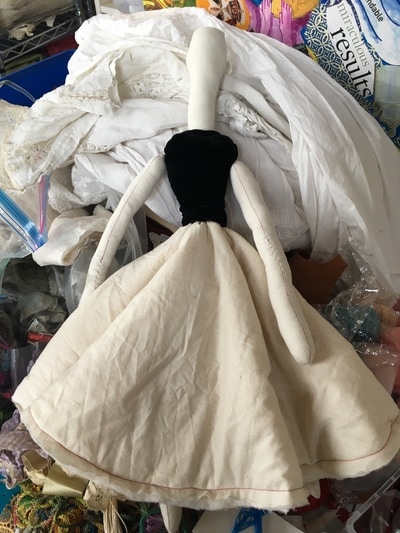
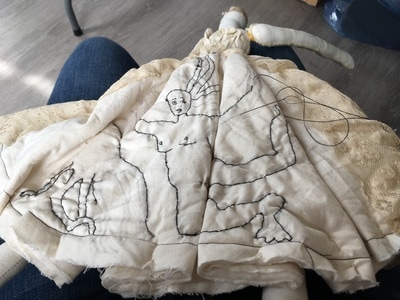
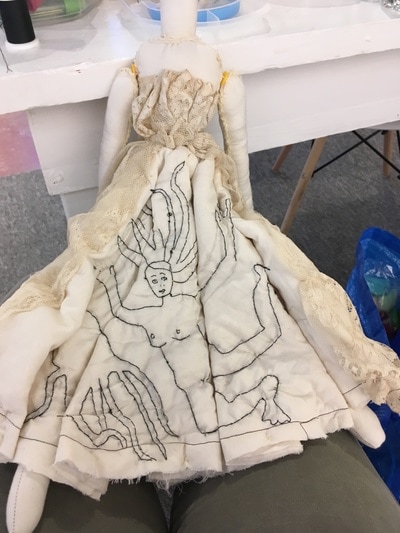
Below are some images from a new series of lace flip dolls that I am currently working on. I'm using lace and other fabrics from my mother's attic stash. She and my step-father are moving from their ancestral home where the attic was full of five to six generations worth of antique fabrics and lace dating back to the Civil War era. My mother has also donated some of this fabric to Michael Melle, an artist local to their area, the Berkshires, and who makes figures out of straw and peat, "dressed" in antique clothing. The two dolls depicted here, both with the same body but one with a large loose skirt and the other with a tight and narrow skirt, started off in response to the questions: 1. what are the advantages vs disadvantages of structure and constraint? 2. what are the advantages vs disadvantages of openendedness and freedom? The doll with the tight skirt is very difficult to flip, because of the tightness of the skirt. One side is lacy and decorated with only ecru and white colors. The other side (not shown) is more colorful. The stitched image on the doll with the looser skirt has to do with freedom and joy. This is an example of going with the theme as it develops. I don't really know exactly how these dolls with develop next. Stay posted.
3 Comments
soozie brendler
5/29/2017 06:20:39 am
I have some books that you may want to borrow, along with a Little Red Riding Hood/Big, Bad Wolf-Granny flip doll that was gifted to me from a friend from Germany, for you to see.
Reply
Leave a Reply. |
ErikaI've been making dolls for about ten years now. I believe that dolls serve as representations and reminders of the best part of ourselves. I am excited to share with you here my learnings about new methods and techniques for doll making and healing. So glad you are here! Categories |
Proudly powered by Weebly
 RSS Feed